This article describes how to create, print and save envelopes from BCB, customize recipient's address, set up a return address, add logos and images on envelopes, choose envelope type, change envelope settings and more.
Print envelopes (People list)
Print envelopes (Company list)
Create a list of recipients
Set up recipient's address for contacts from the People List
Set up recipient's address for contacts from the Company List
Set up a return address
Customize Recipient and Sender's addresses
Add images and logos on an envelopea
Choose from multiple addresses
Set envelope position
Preview an envelope before printing
Supported envelope types
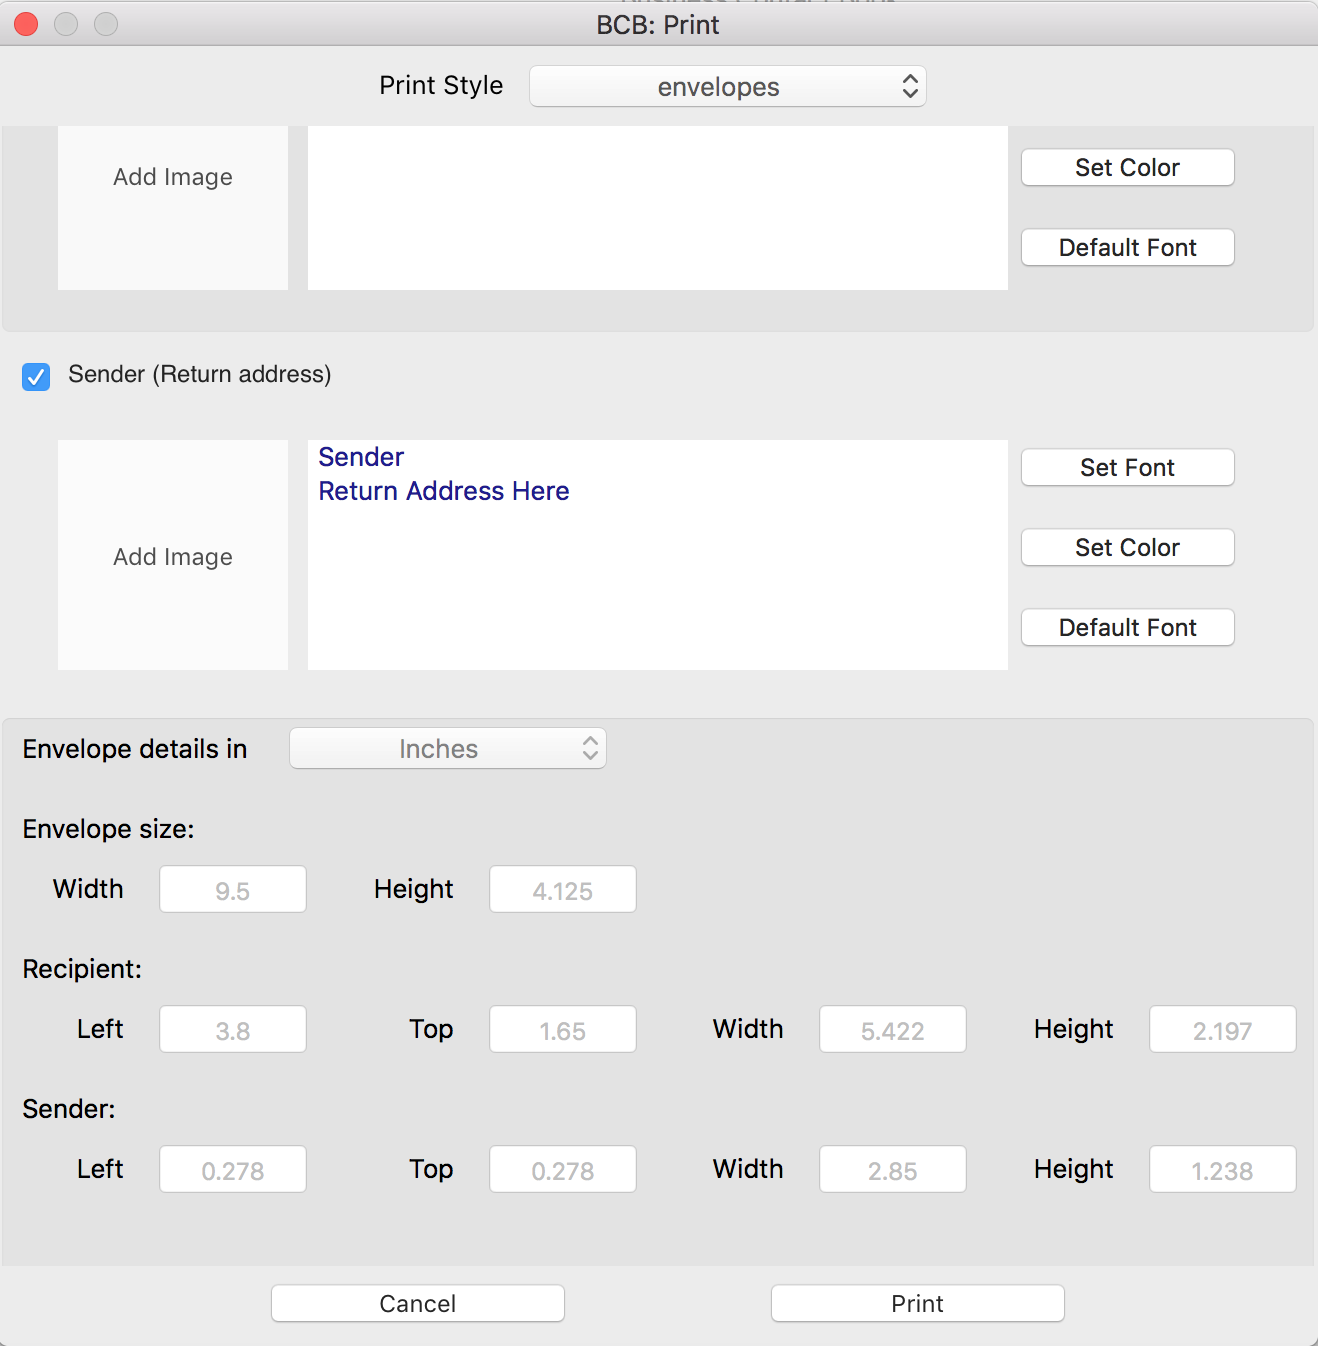
Envelopes details
How to print a single envelope or a list of envelopes for contacts from the People list
1. Select contacts. You can sort them the way you need before printing.
2. From the top menu select Contacts > Print.
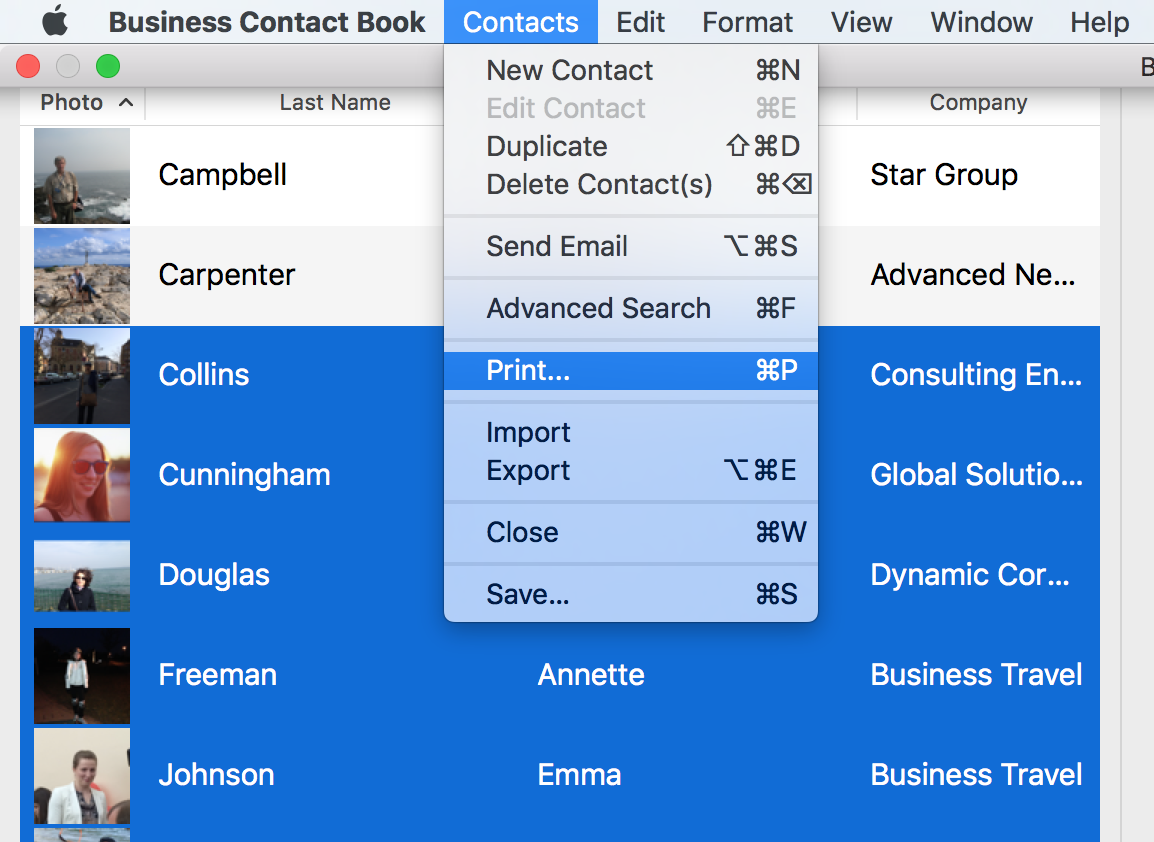
or either press Cmd+P or select Print from the context menu.
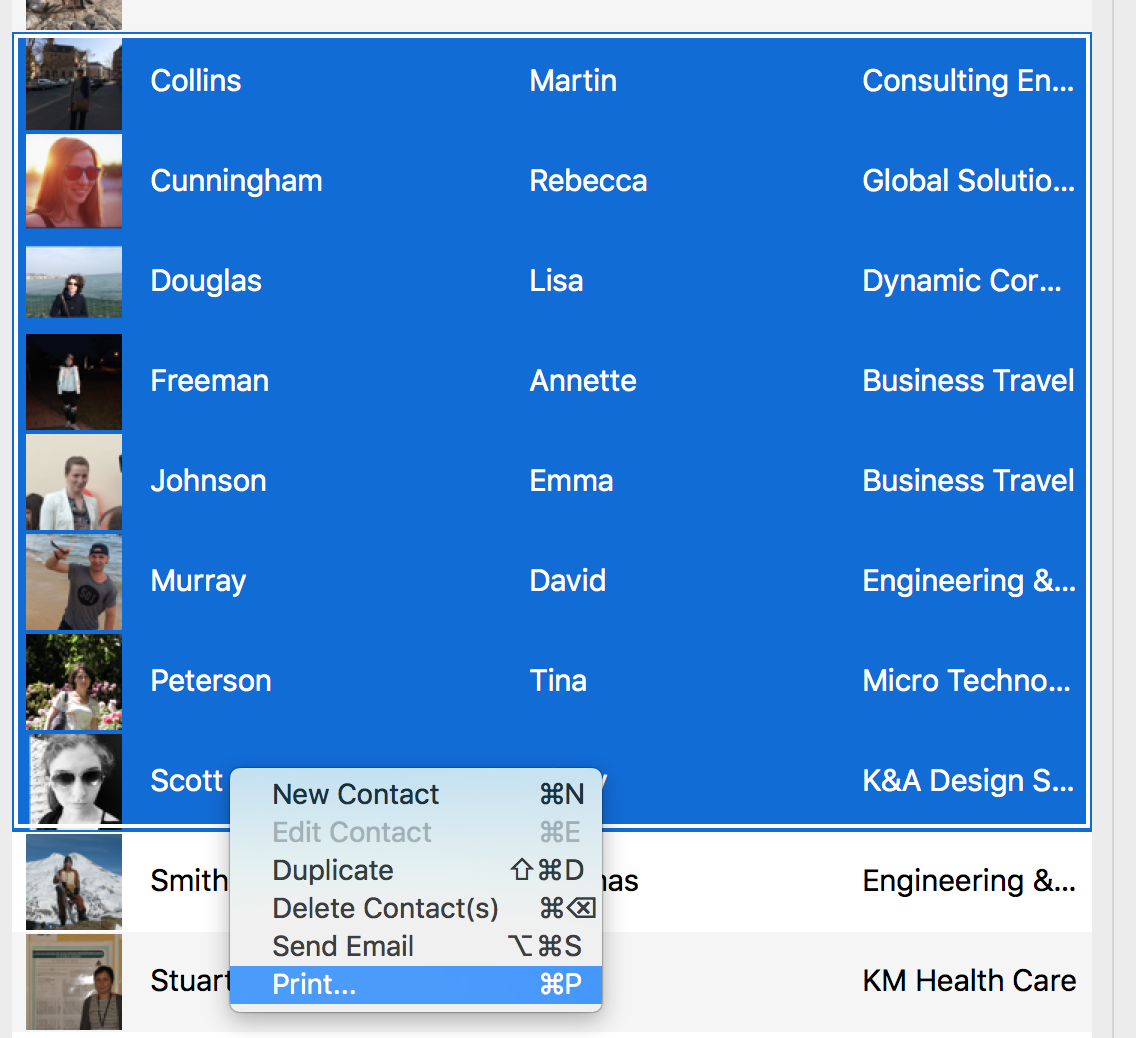
3. Choose Envelopes from the Print Style pop-up menu.
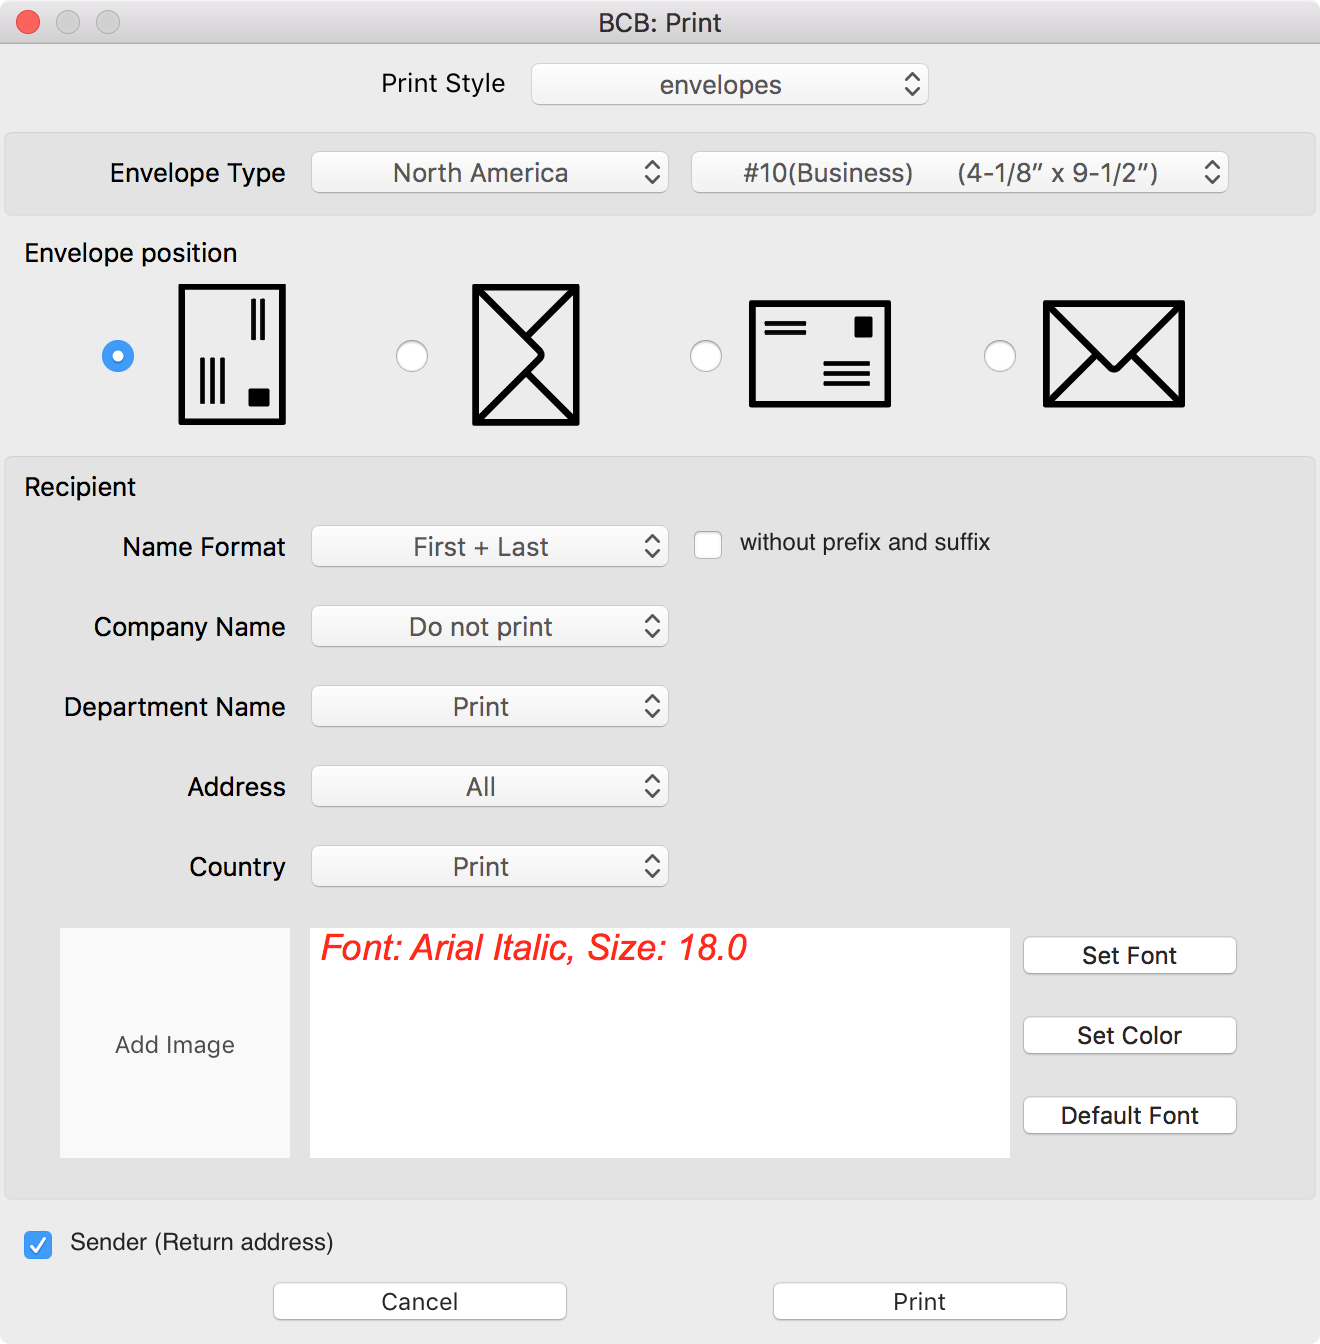
4. Choose the envelope type.
 Supported US envelopes
Supported International envelopes
5.
Choose the desired Envelope position.
6. Customize recipient's address:
- Name format
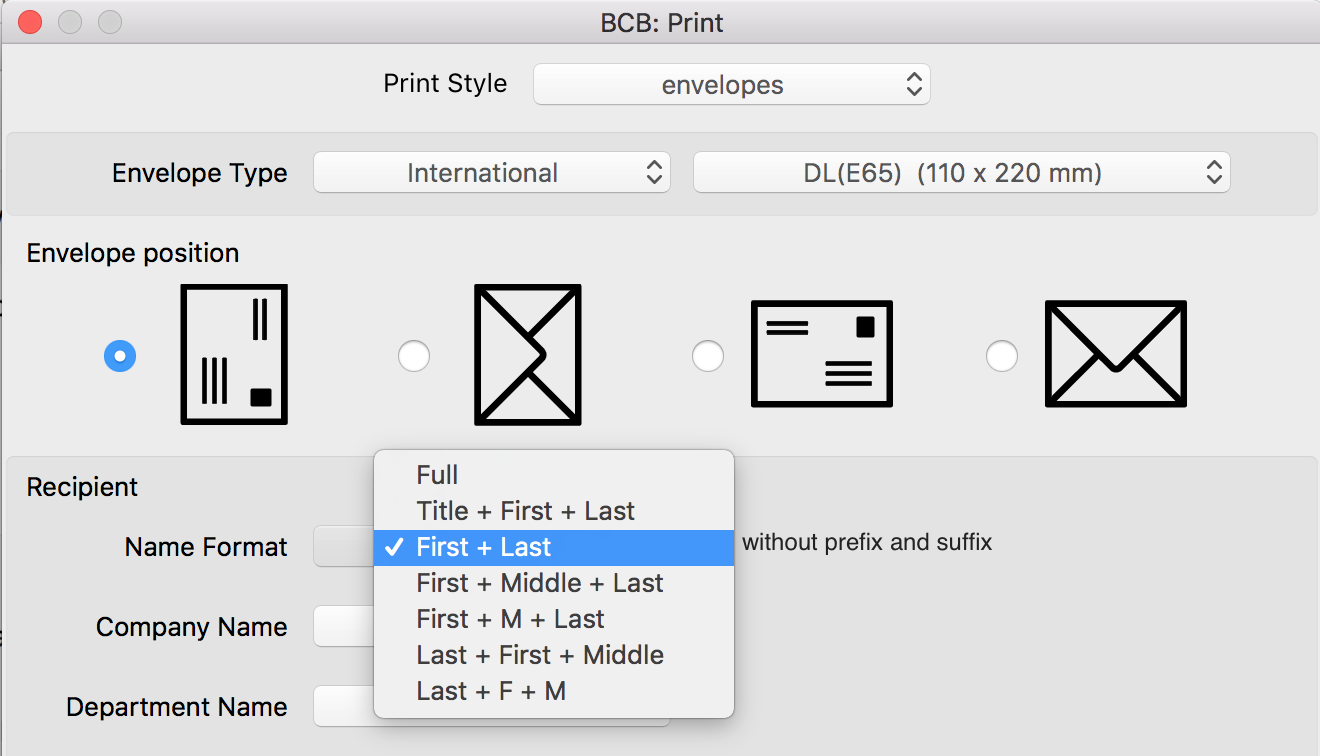
- choose if you want to print Company Name and Department Name
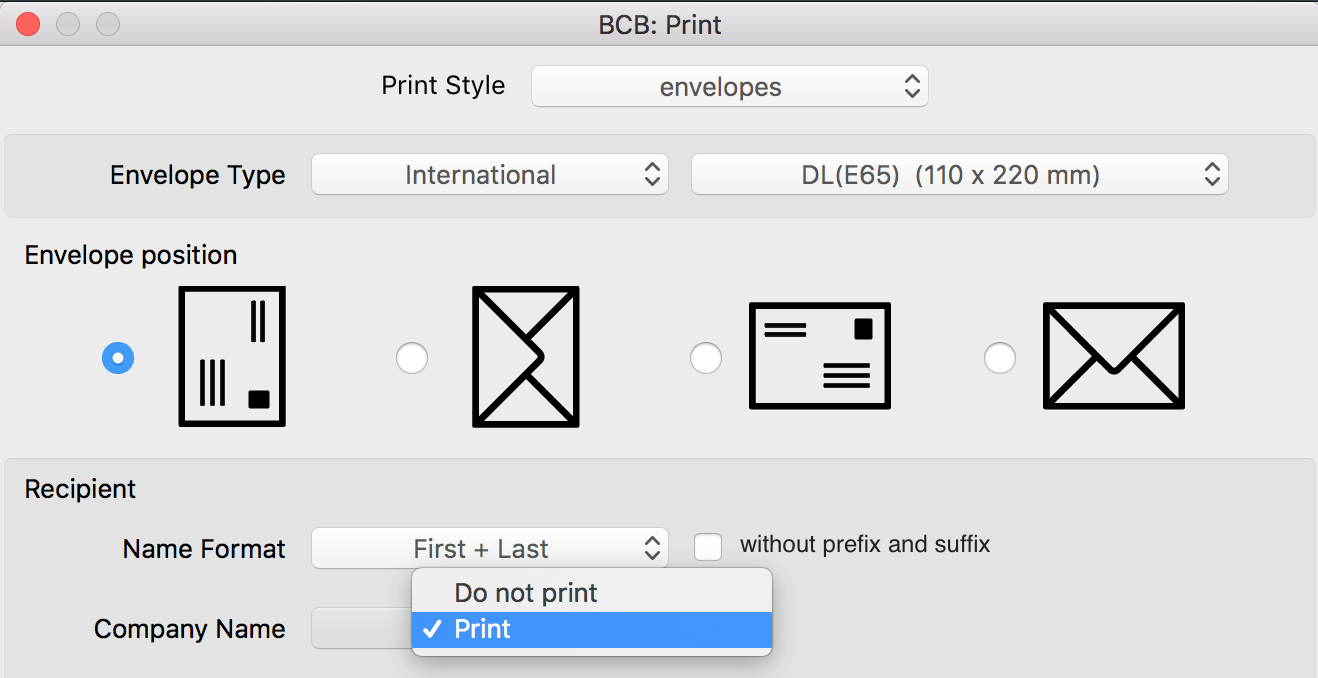
- choose the Address type (All, First Address only, main only, work only, home only, other only, first main only, first work address only, first home address only, first other address only, Do not print)
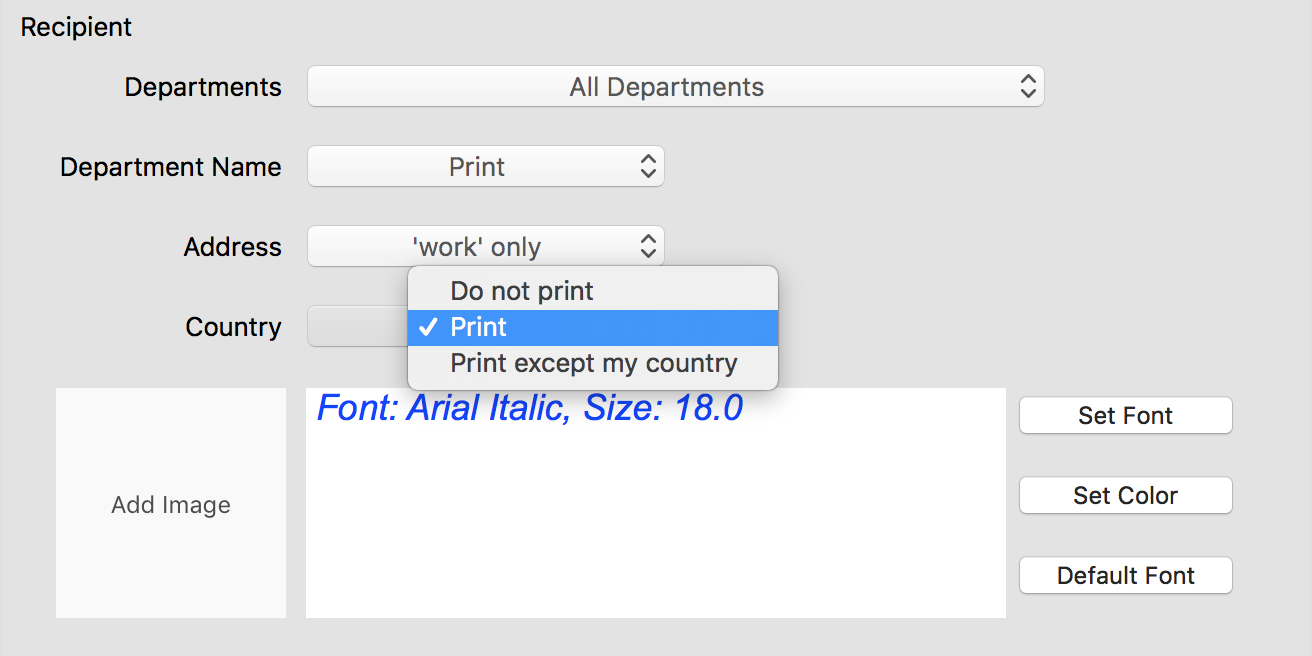
- choose if you want to print country information: Do not print, Print, Print except my country

7.
Customize Recipient's address
8. To print
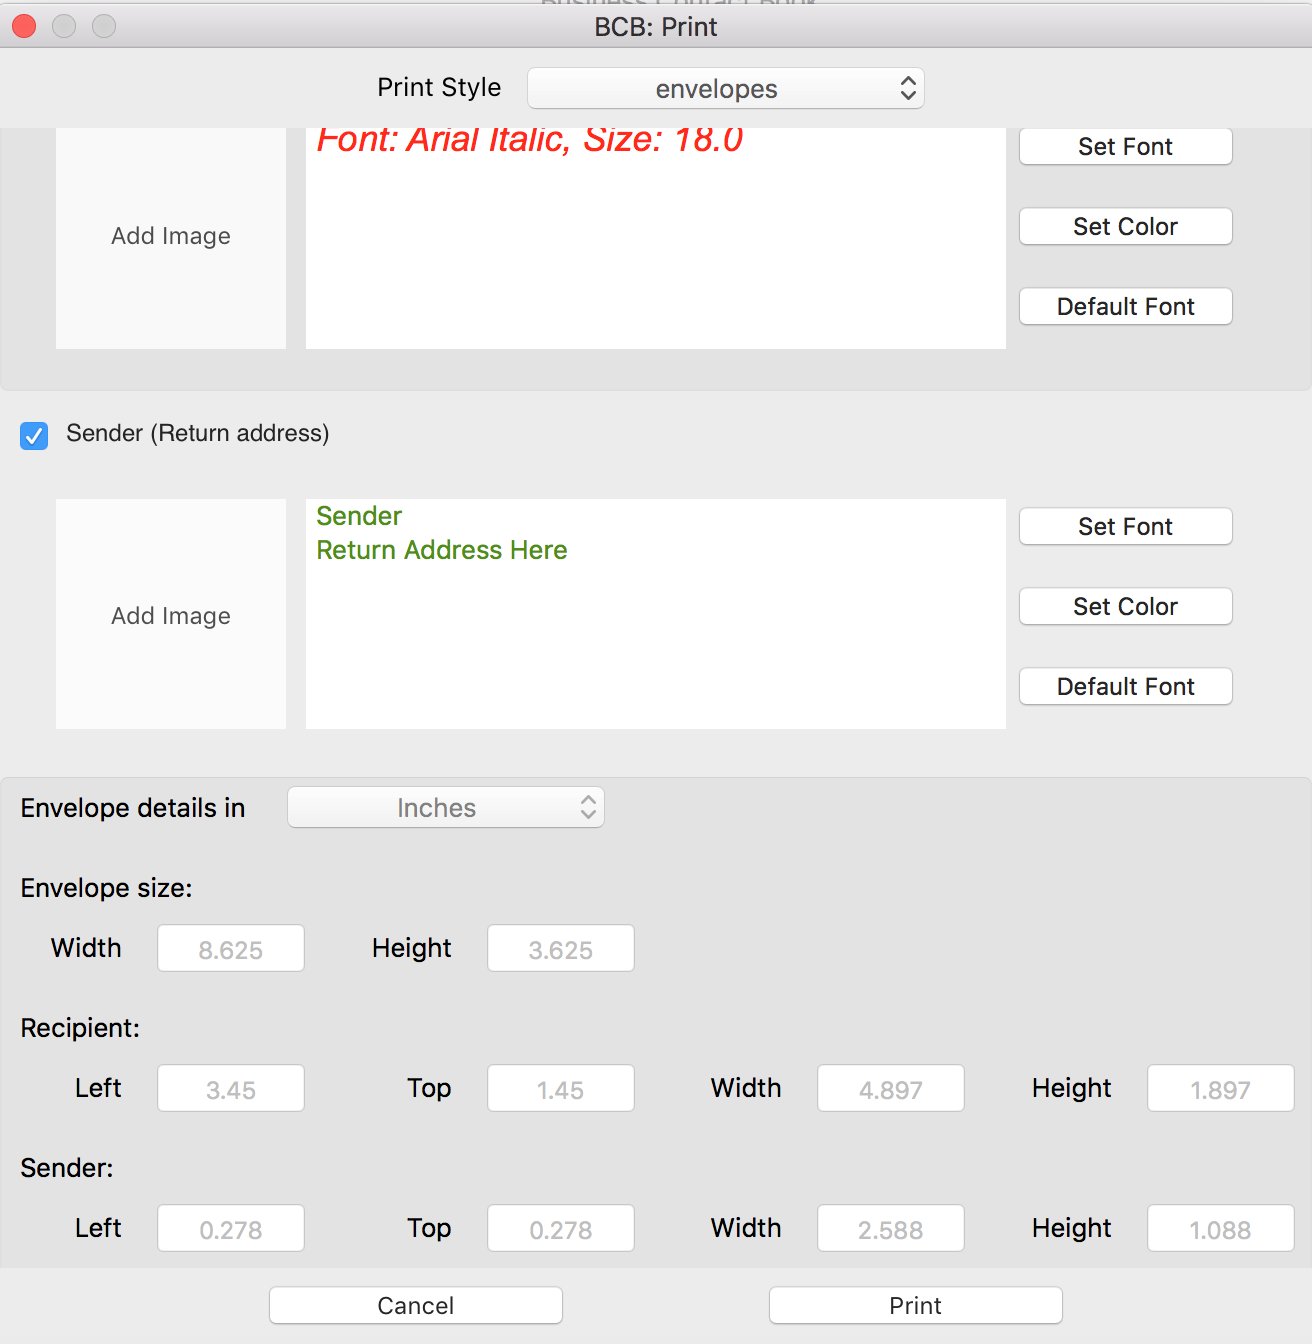
Sender's address, put the check mark for the 'Sender (Return address)' field, type the necessary information into the text box and
customize it the way you want.
9. Click the Print button.
10. Before you start printing, verify if everything is set up correctly. For more information please see
Preview an envelope before printing
11. If you are happy with the customisation, click Print.
Print envelopes for contacts from the Company list
1. Select a company or a list of companies.
2. Select Contacts > Print from the top menu
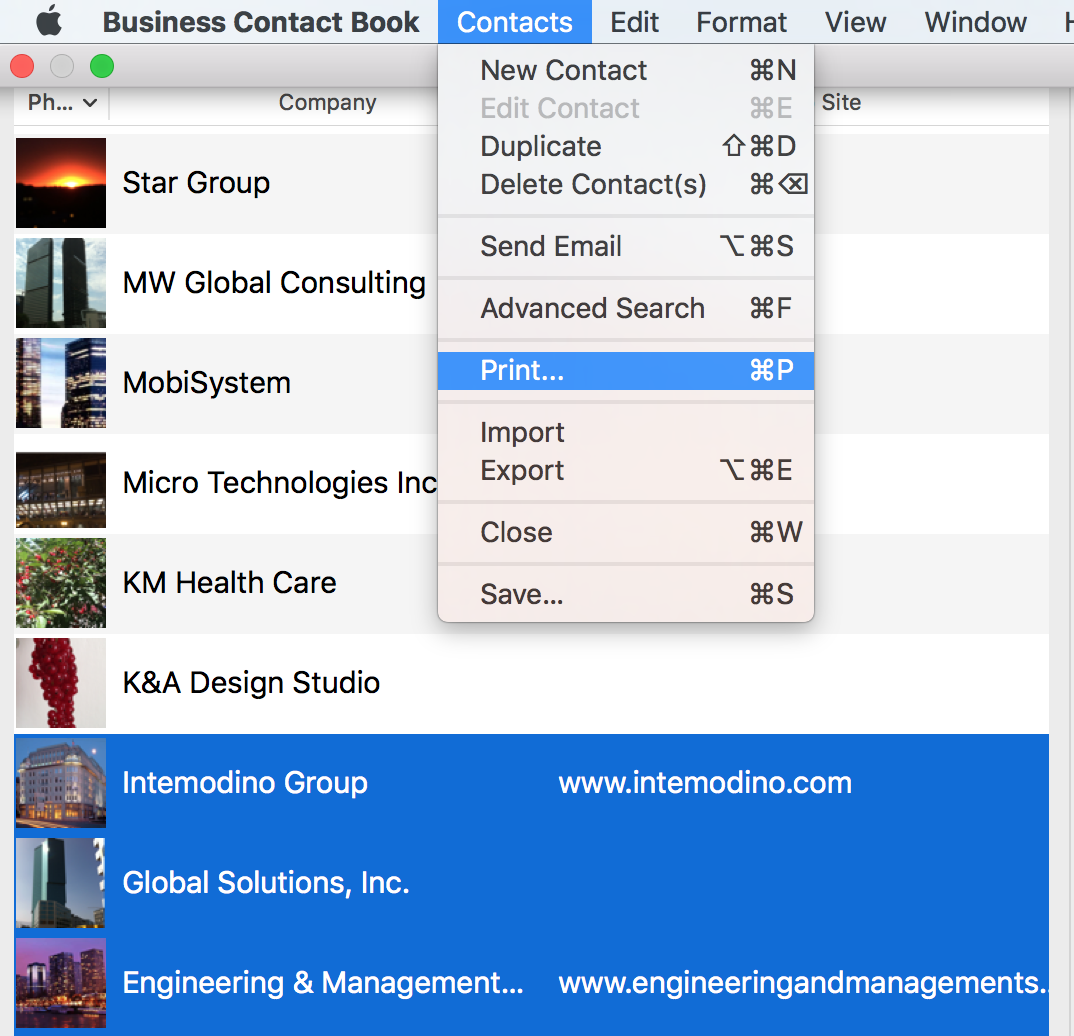
or select Print from the context menu or press Cmd+P.
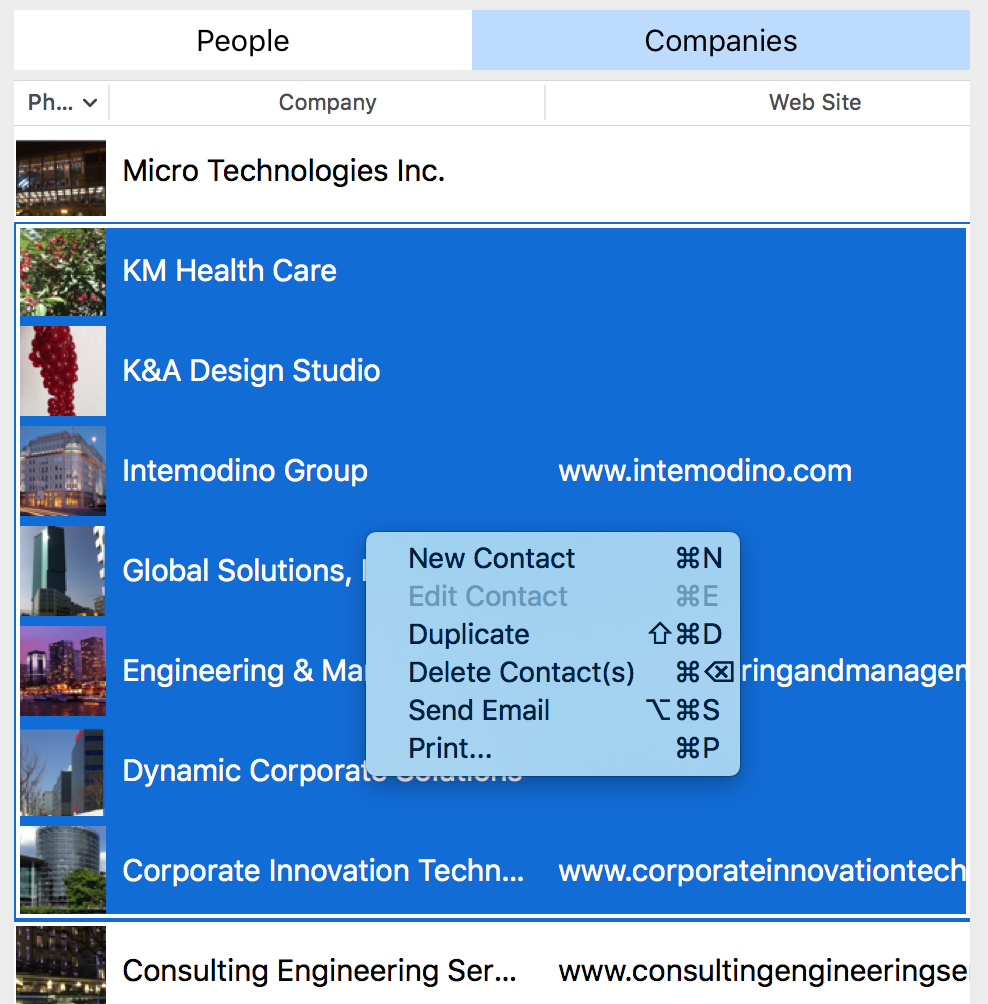
3. Choose Envelopes from the Print Style pop-up menu.
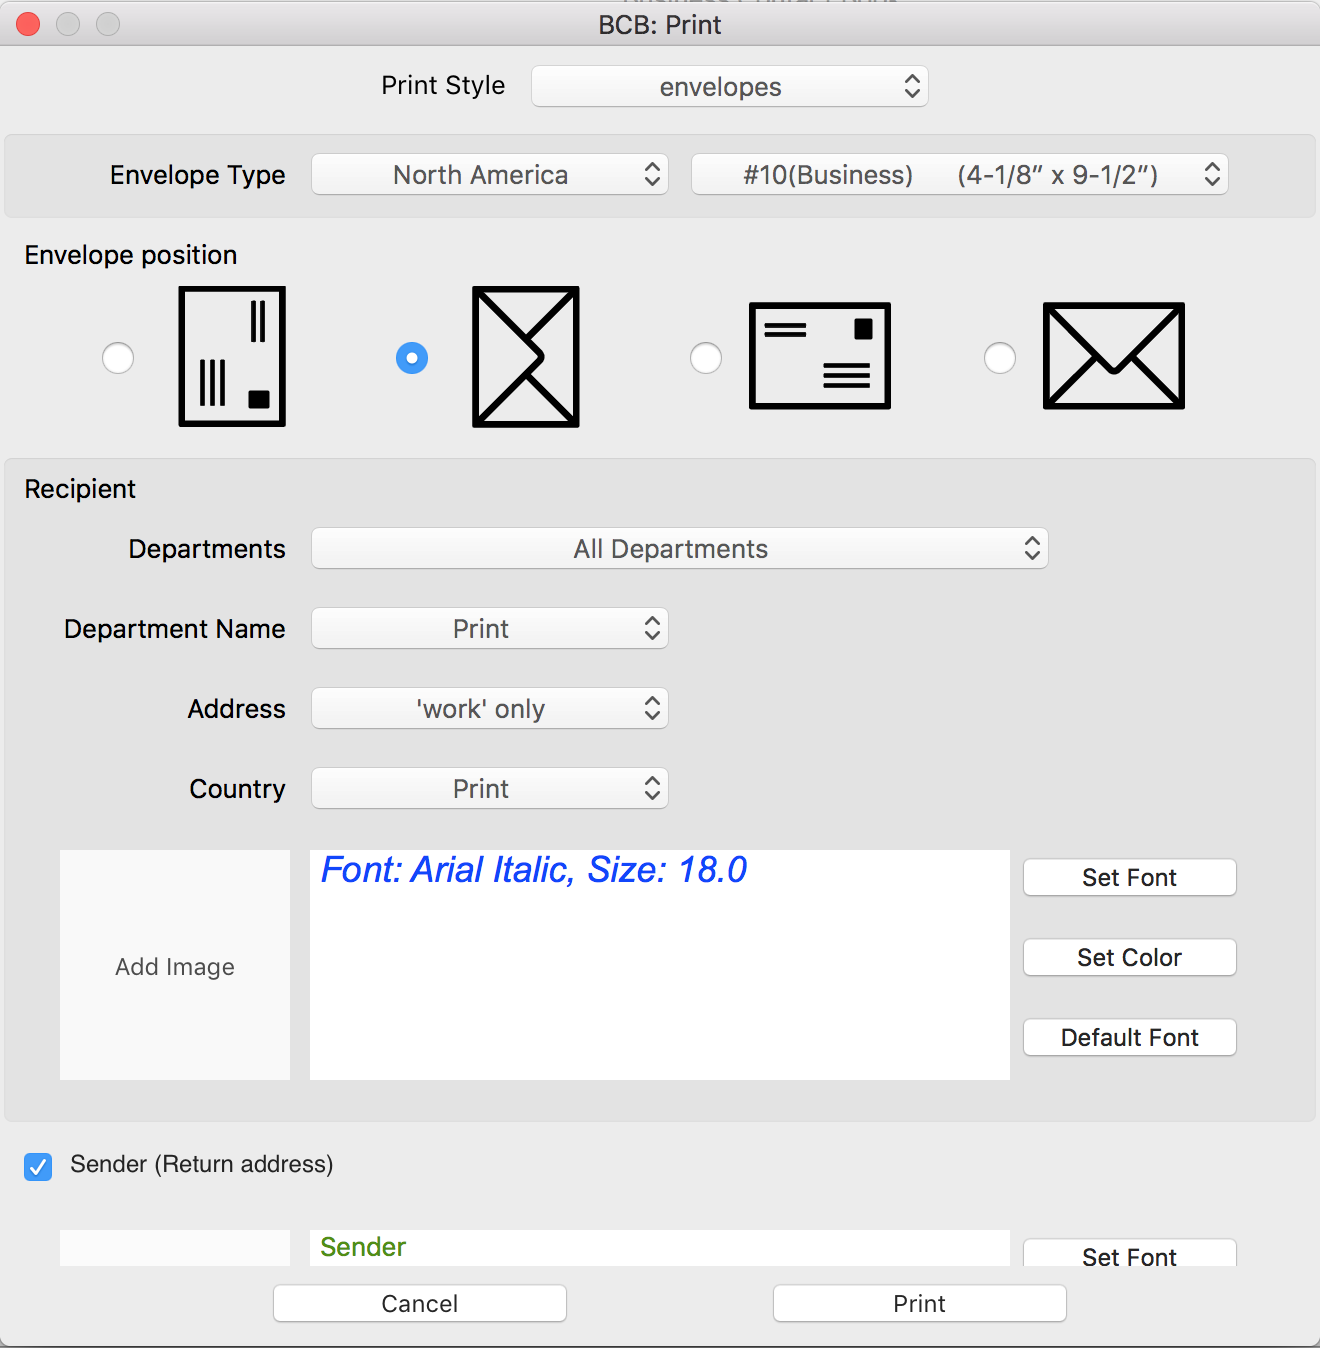
4.
Choose the Envelope type.
5.
Set the desired Envelope position.
6. Set up recipient's address.
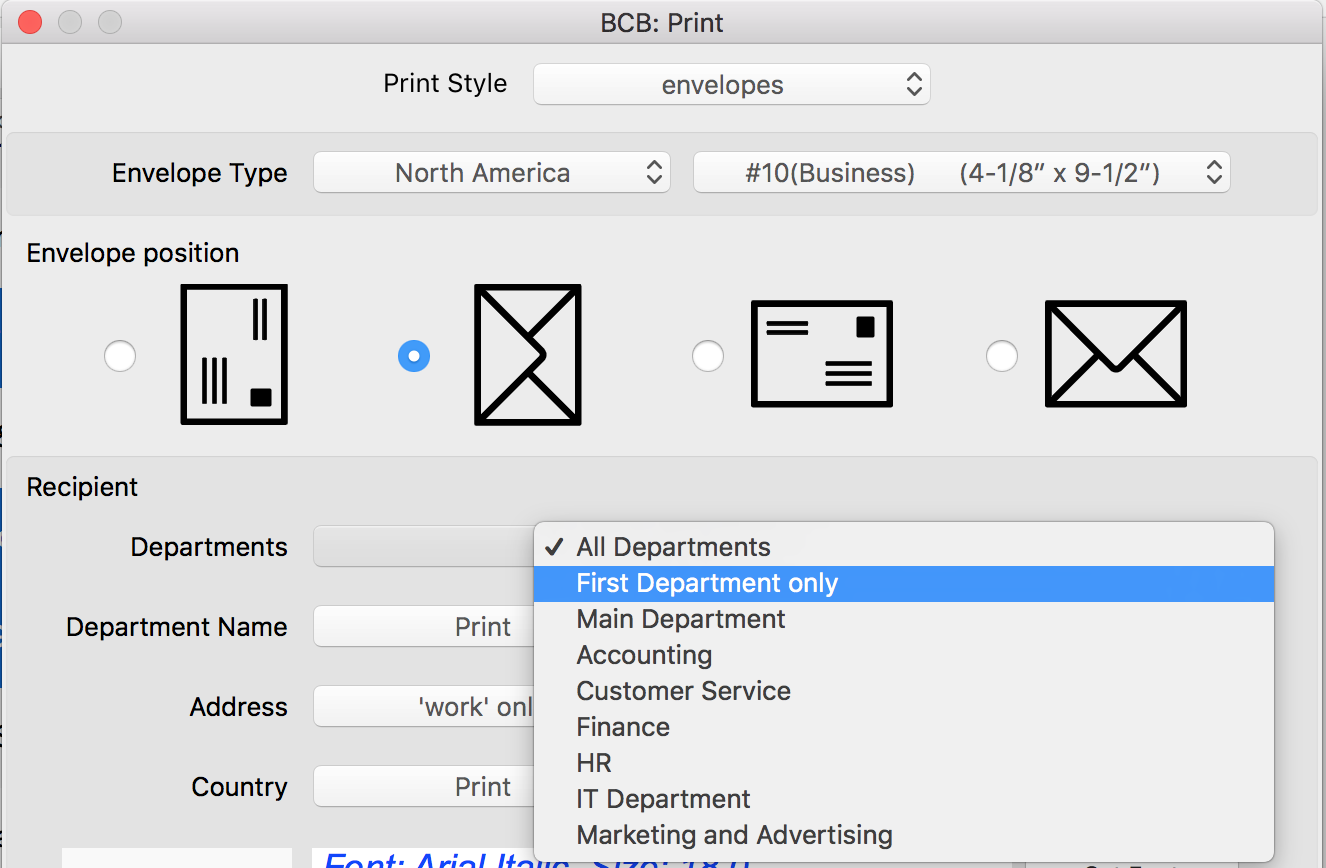
- Department name: choose if you want to print envelopes for the certain, first or all departments
- choose if you want to print the Department name

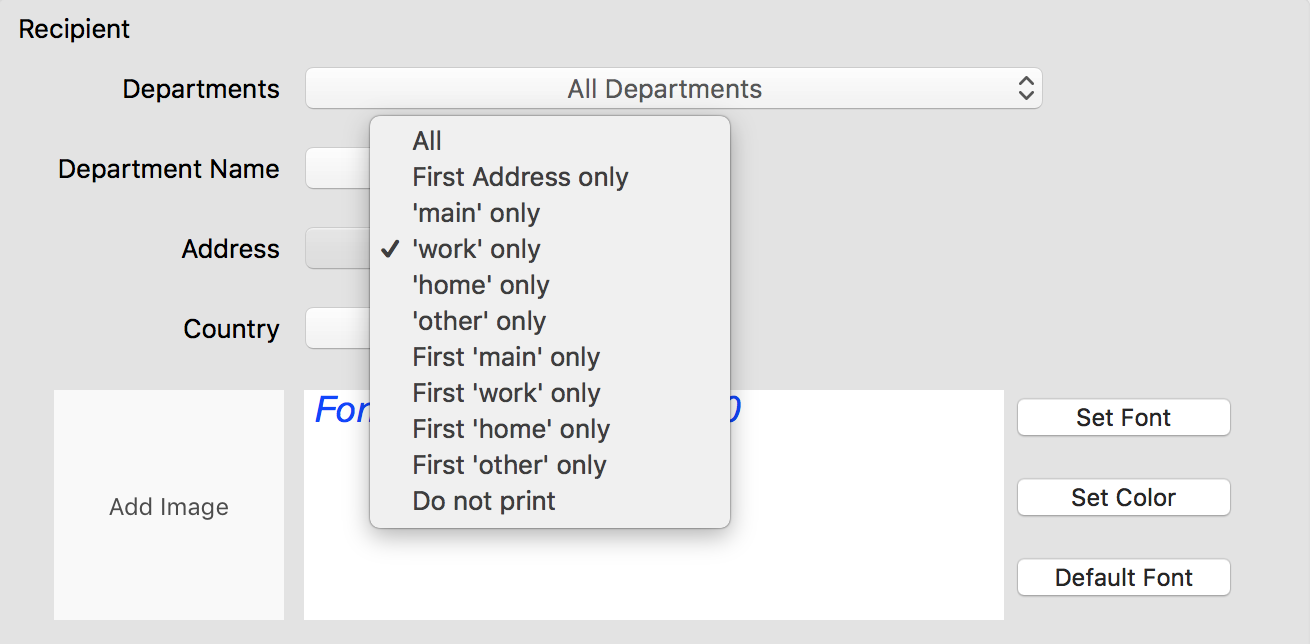
- specify the Address type (All, First Address only, main only, work only, home only, other only, first main only, first work address only, first home address only, first other address only, Do not print)
- choose if you would like to add country information: Do not print, Print, Print except my country
7.
Customize Recipient's address
8. In case you want to print
Sender's address, put the check mark for 'Sender (Return address)', type the necessary information into the text box and
customize it the way you want.
9. Click the Print button.
10. Verify if everything is set up correctly. For more information please see
Preview envelopes before printing
11. Click Print.
Create a list of recipients
There are three ways to set up your mailing list:
- select contacts manually
- use the Search option, for example you may choose to print envelopes for the contacts from the certain city
- choose the desired Group(s). With BCB, cou can create different Groups for different purposes. For example, you can set up Groups for sending promotions or invitations.
Note: If you want to print envelopes for contacts stored in you Mac Contacts application, you should import them to BCB first. For more information, see how to
import contacts from Mac Contacts.
Set up a return address
1. Open the BCB Print window.
2. Select the "Envelopes" print style.
3. Scroll down, and under Sender, type your return address in the box and
adjust its look.
How to customize Recipient and Sender's addresses
- Use the 'Set Font', 'Set Color' and 'Default font' buttons to format the delivery and return addresses.
Note: in case of long text strings, the app automatically scales down the text size to fit the available address space.
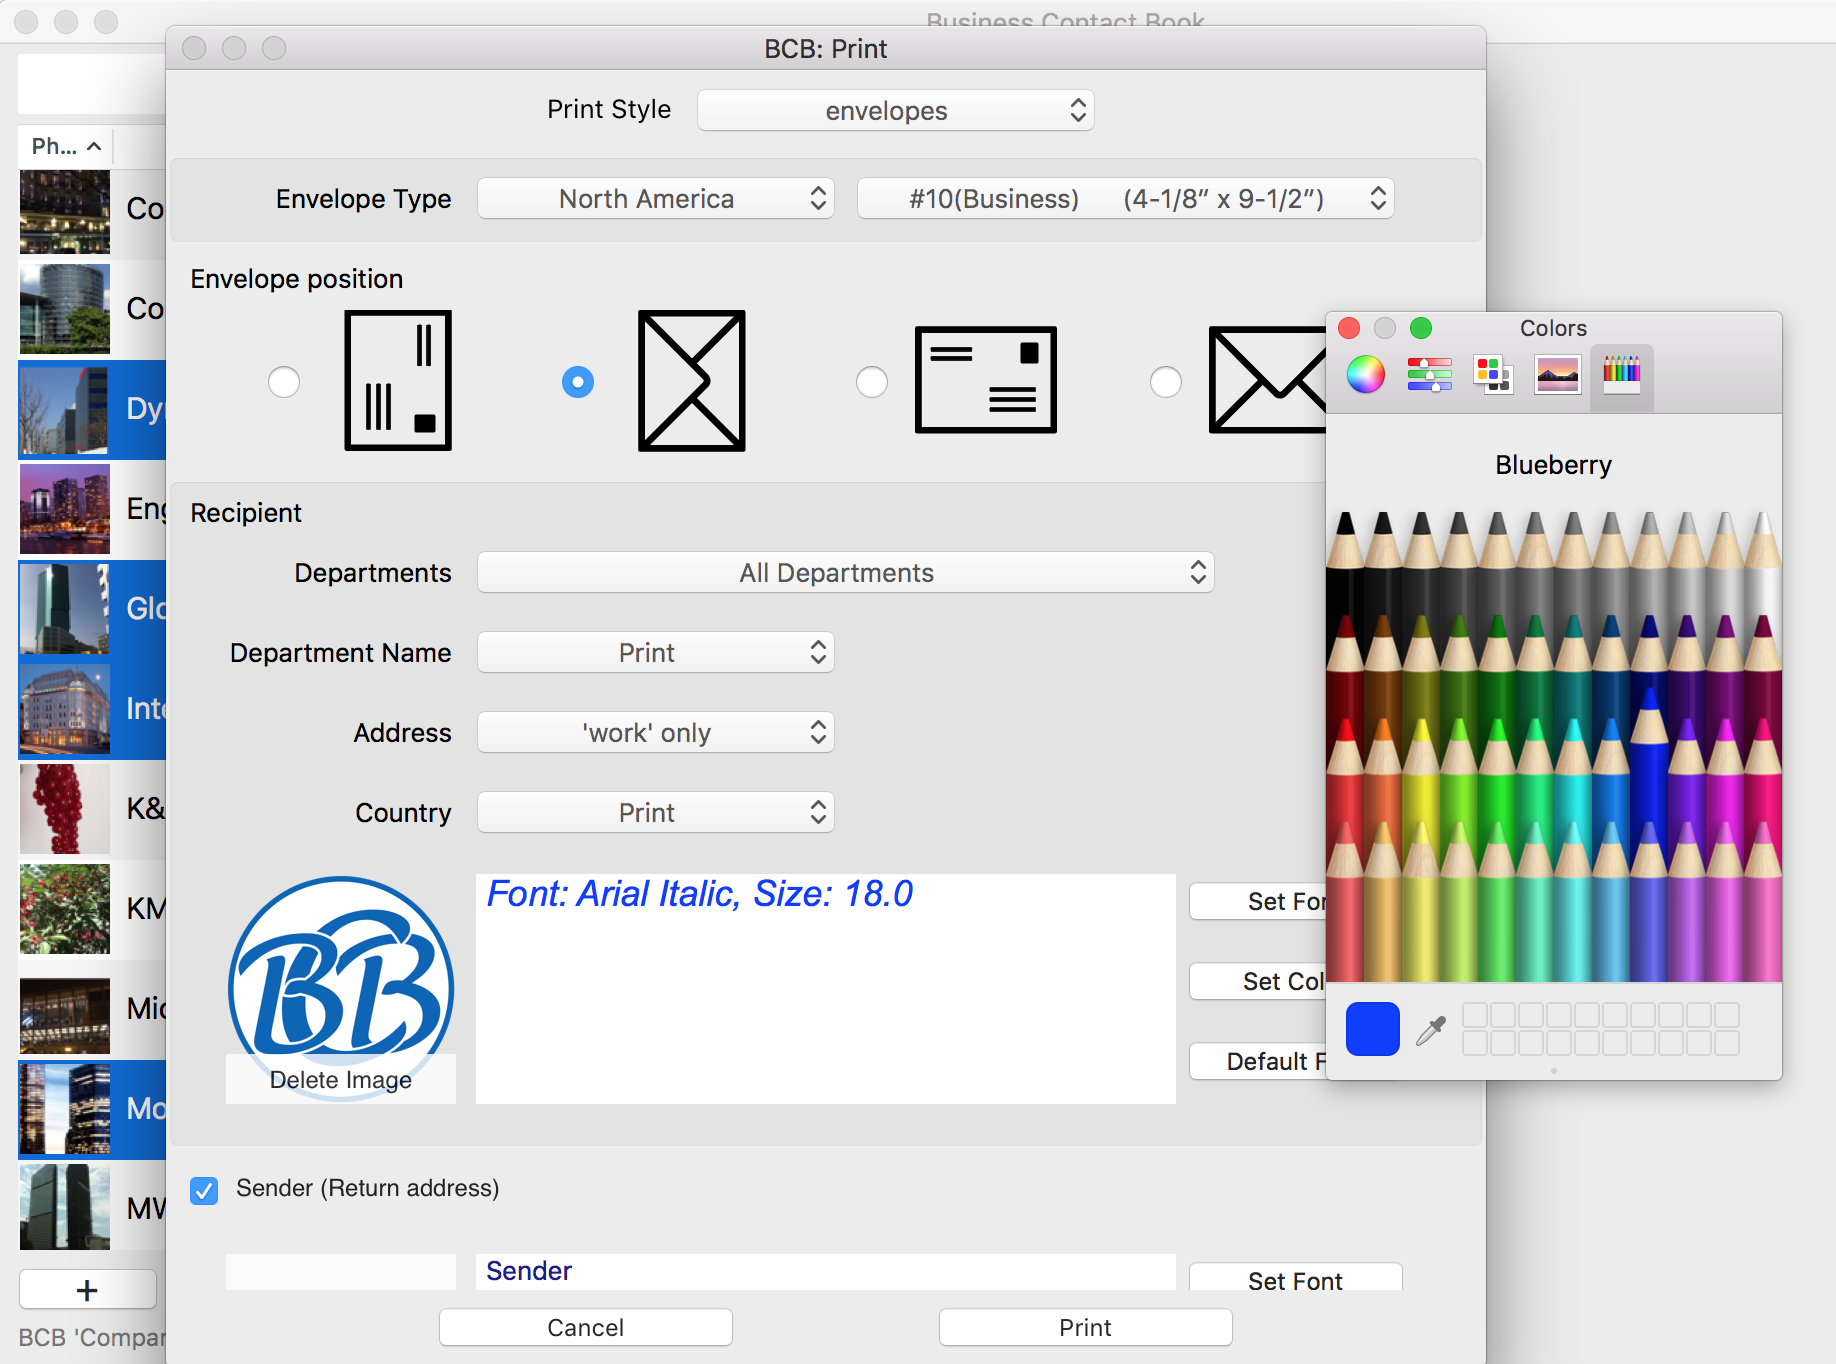
- If you would like to add an logo or image, click the Add image button, choose the image you would like to use and click Select. The app positions and resizes it automatically.
Set your envelope position
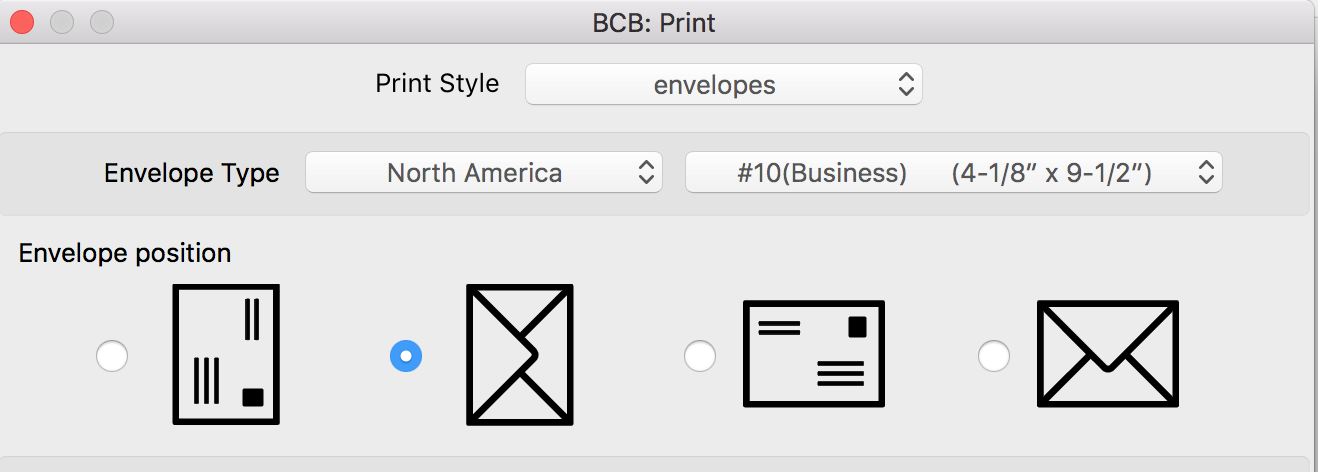
Choose the way how you are going to load the envelope into the printer:
- the envelope can be face up or face down
- choose whether the long or short edge will be fed into the printer.
Preview an envelope before printing
Before you start printing, you may want to preview your envelopes to understand how they will look and if the text fits text areas for addresses. You may select the 'Open PDF in Preview' option or save your envelope(s) as PDF or print your envelope to a regular sheet of paper first.
- In the BCB Print, click the Print button.
- Select "Open PDF in Preview". Alternatively, you can use the Save PDF option.
Supported envelope types
You can choose from more than 30 envelope types, including commonly used envelope sizes such as US #10 (Business), US #9 , US #6, #6 3/4, International DL(E65), International C5, and more.

If you don’t see your envelope type,
contact us to add it to the list of supported envelopes with the dimension information.
Supported US envelopes
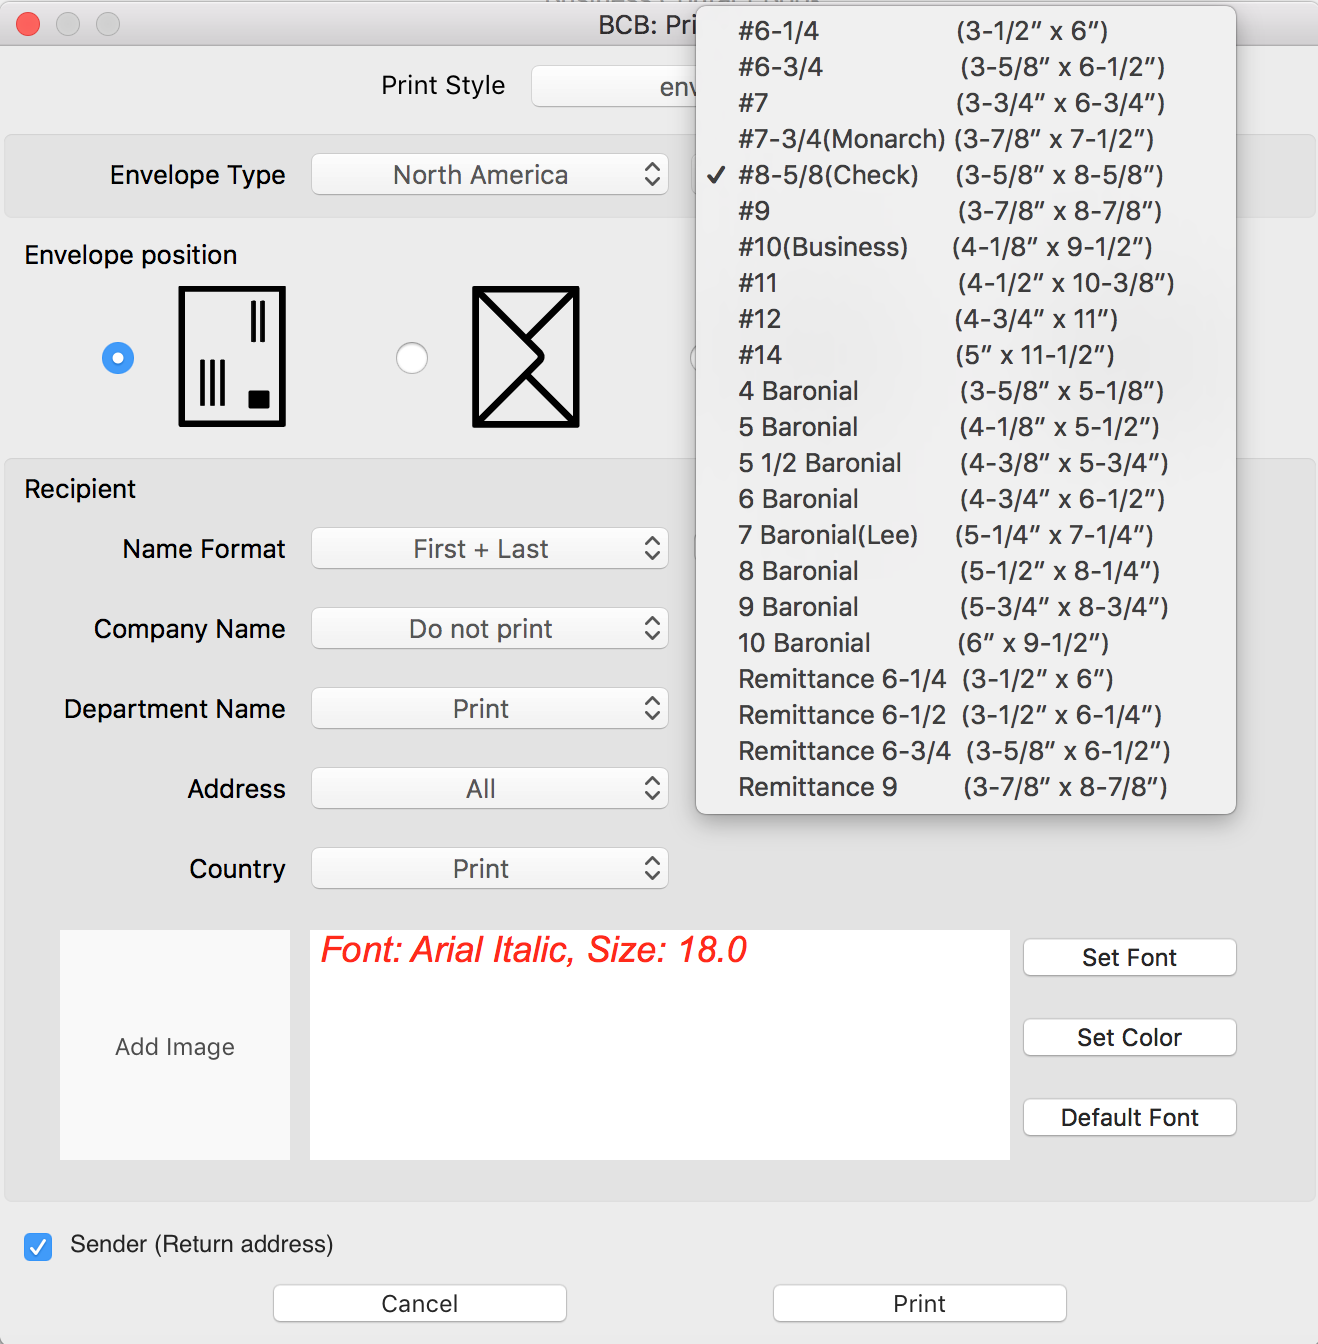
Supported International envelopes
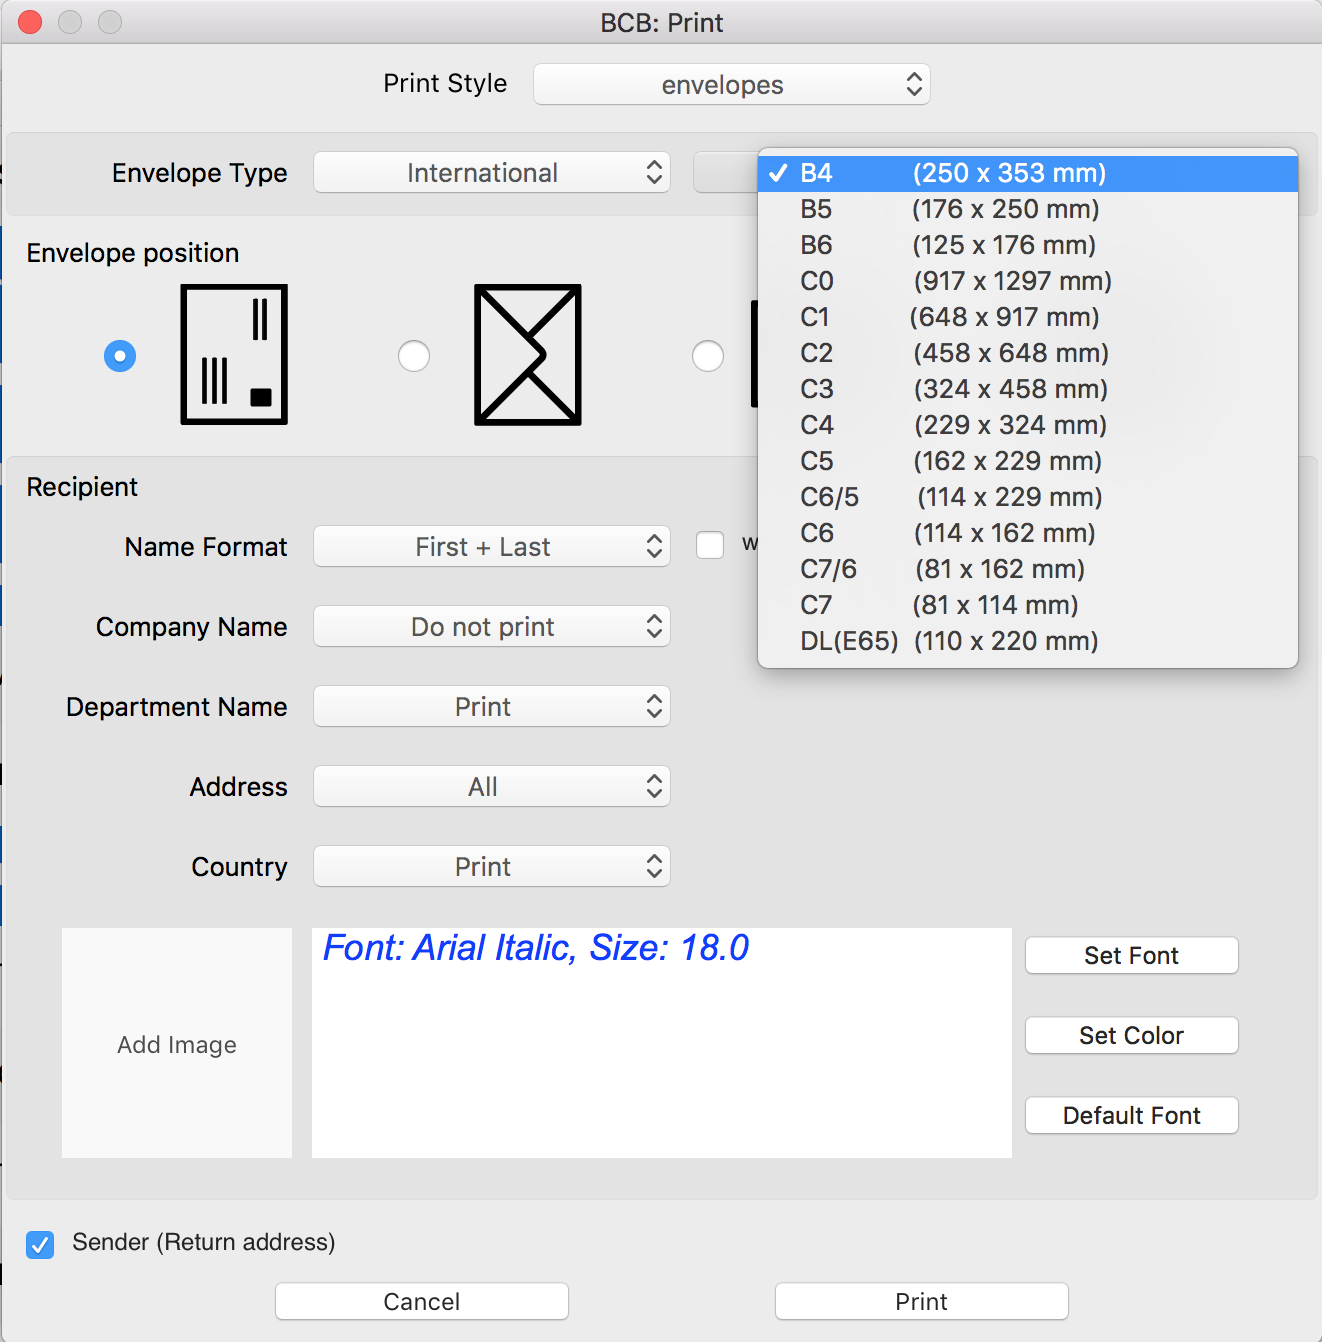
Envelope details
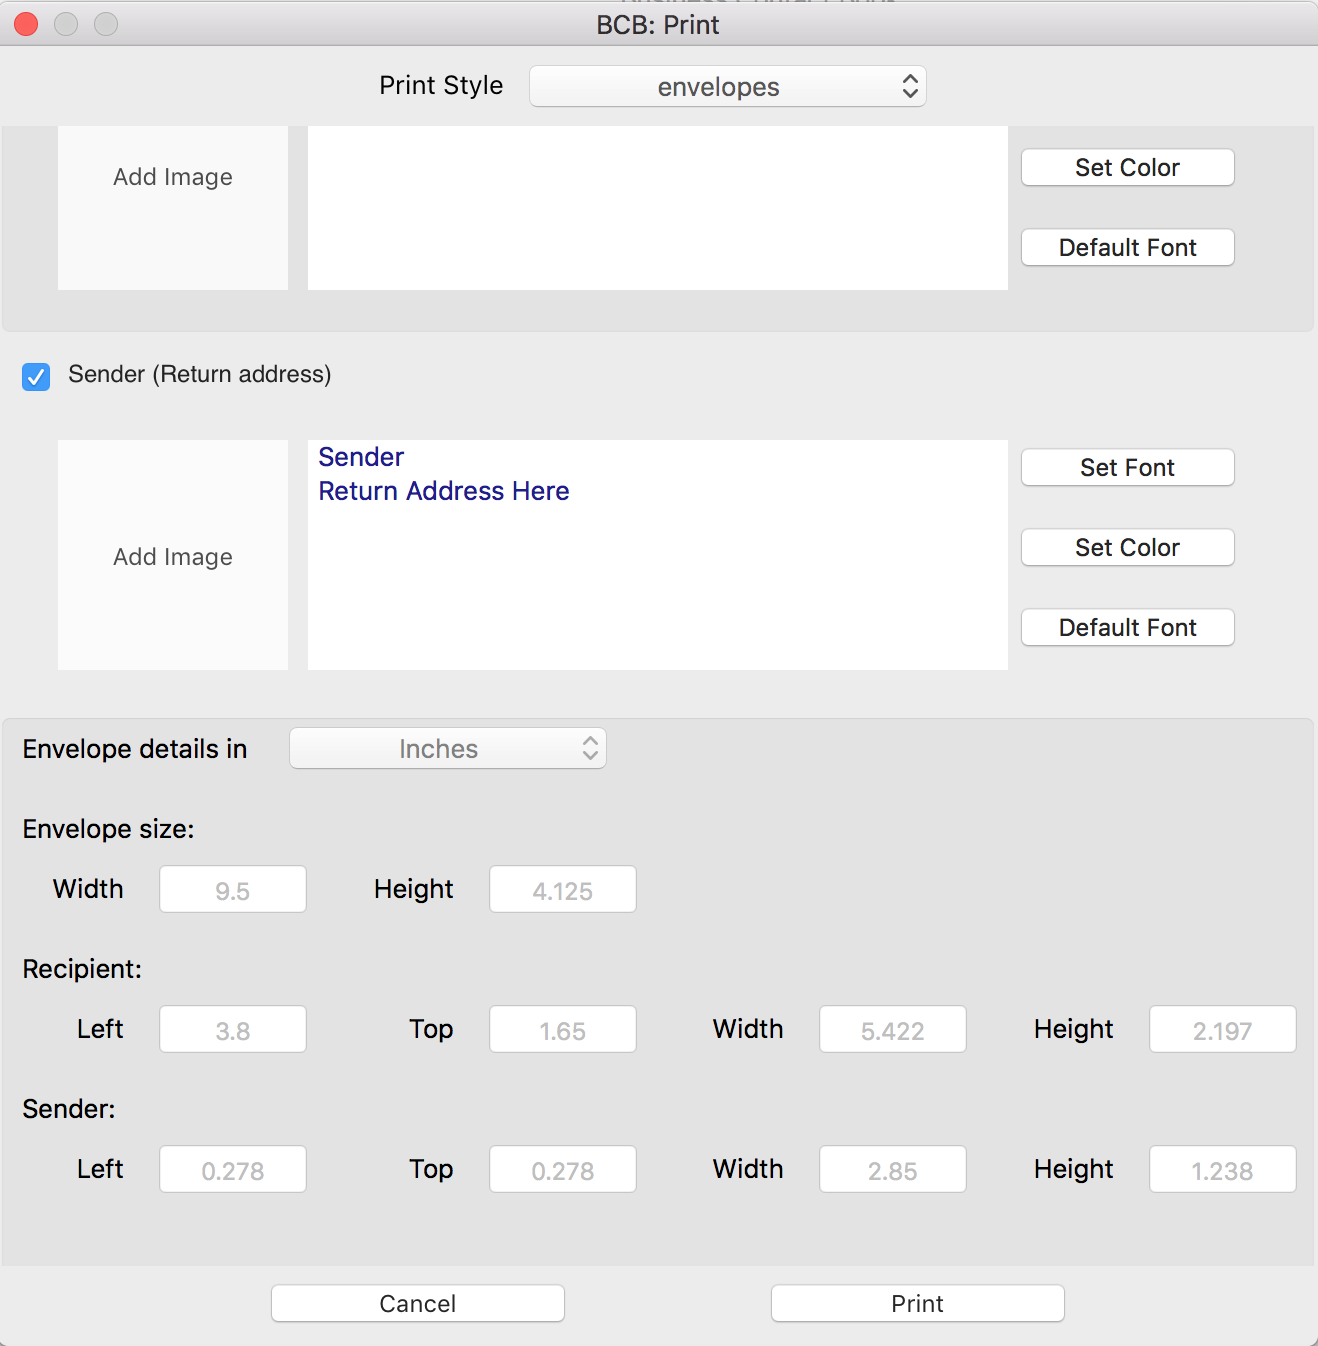
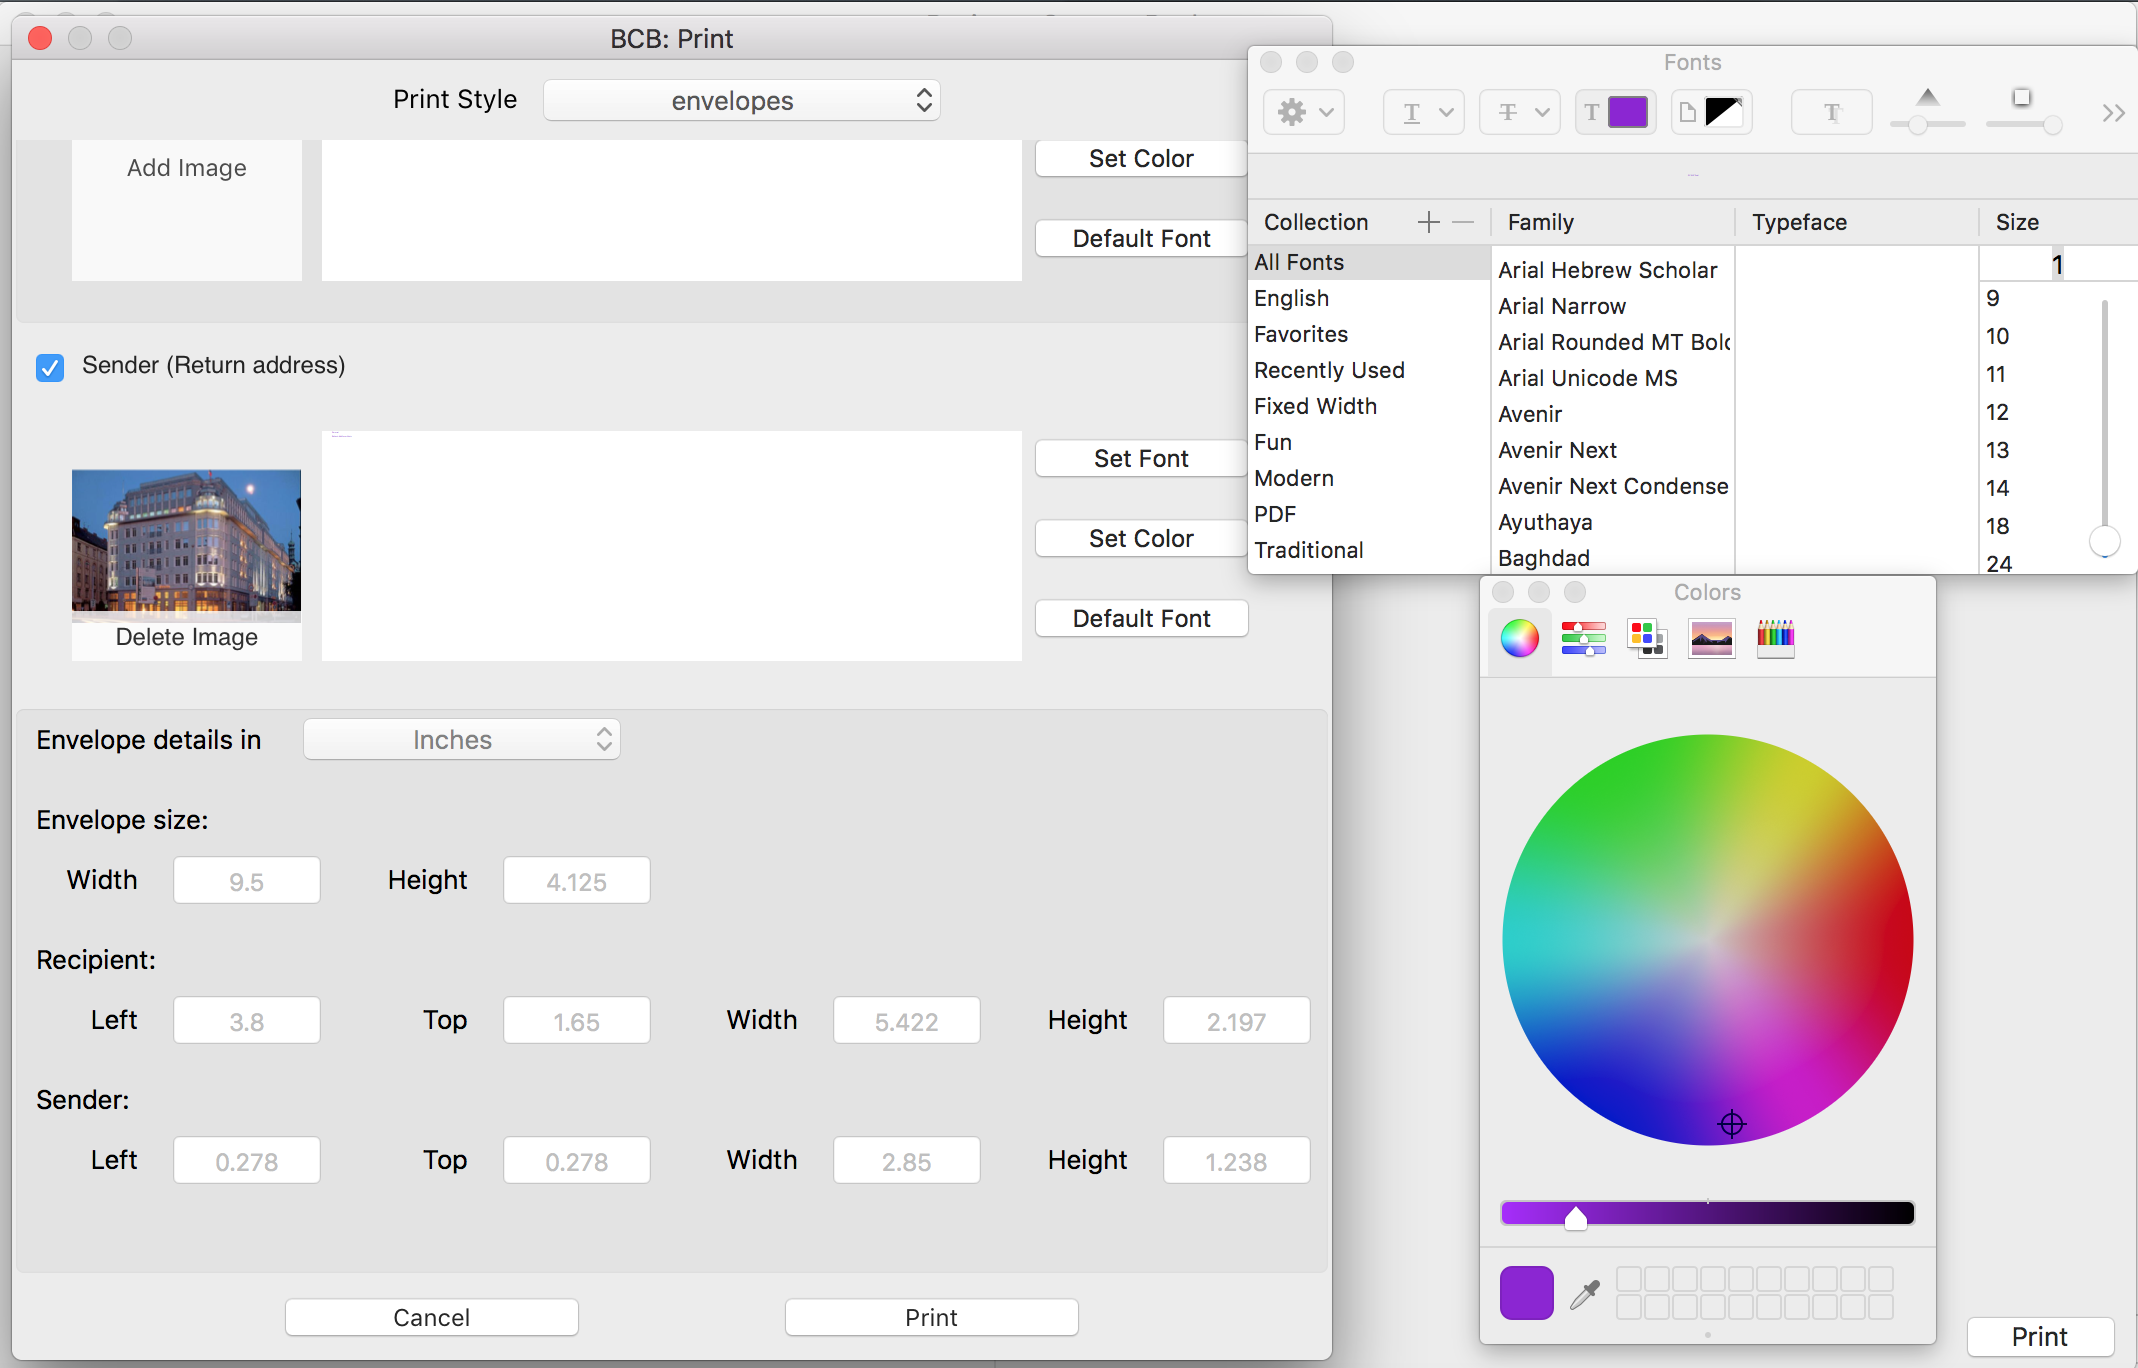
The envelope size is shown next to envelope type. For more detailed information, scroll-down to the very bottom of the window:
- envelope's width and height
- Recipient's box: width, height, top and left margins
- Sender's box: width, height, top and left margins
Please note that this information is for informative purposes only and cannot be edited. For US envelopes, dimensions are shown as fractional and decimal inches, for international envelopes all the sizes are in millimeters.
Envelope size chart
Please see the Envelope Size Chart that helps you understand envelope sizes.
| Name |
Height x Width (decimal equivalent) |
US ENVELOPES |
| #6-1/4 |
3-1/2″ x 6″ (3.500 x 6.000″) |
| #6-3/4 |
3-5/8″ x 6-1/2″ (3.750 x 6.750″) |
| #7 |
3-3/4″ x 6-3/4″ (3.750 x 6.750″) |
| #7-3/4(Monarch) |
3-7/8″ x 7-1/2″ (3.875 x 7.500″) |
| #8-5/8(Check) |
3-5/8″ x 8-5/8″ (3.625 x 8.625″) |
| #9 |
3-7/8″ x 8-7/8″ (3.875 x 8.875″) |
| #10(Business) |
4-1/8″ x 9-1/2″ (4.125 x 9.500″) |
| #11 |
4-1/2″ x 10-3/8 (4.500 x 10.375″) |
| #12 |
4-3/4″ x 11″ (4.750 x 11.000″) |
| #14 |
5″ x 11-1/2″ (5.000 x 11.500″) |
| 4 Baronial |
3-5/8″ x 5-1/8″ (3.625 x 5.125″) |
| 5 Baronial |
4-1/8″ x 5-1/2″ (4.125 x 5.500″) |
| 5 1/2 Baronial |
4-3/8″ x 5-3/4″ (4.375 x 5.750″) |
| 6 Baronial |
4-3/4″ x 6-1/2″ (4.750 x 6.500″) |
| 7 Baronial(Lee) |
5-1/4″ x 7-1/4″ (5.250 x 7.250″) |
| 8 Baronial |
5-1/2″ x 8-1/4″ (5.500 x 8.250″) |
| 9 Baronial |
5-3/4″ x 8-3/4″ (5.750 x 8.750″) |
| 10 Baronial |
6″ x 9-1/2″ (6.000 x 9.500″) |
| Remittance 6-1/4 |
3-1/2″ x 6″ (3.500 x 6.000″) |
| Remittance 6-1/2 |
3-1/2″ x 6-1/4″ (3.500 x 6.250″) |
| Remittance 6-3/4 |
3-5/8″ x 6-1/2″ (3.625 x 6.500″) |
| Remittance 9 |
3-7/8″ x 8-7/8″ (3.875 x 8.875″) |
International Envelopes ISO |
| B4 |
250 x 353 mm |
| B5 |
176 x 250 mm |
| B6 |
125 x 176 mm |
| C0 |
917 x 1297 mm |
| C1 |
648 x 917 mm |
| C2 |
458 x 648 mm |
| C3 |
324 x 458 mm |
| C4 |
229 x 324 mm |
| C5 |
162 x 229 mm |
| C6/5 |
114 x 229 mm |
| C6 |
114 x 162 mm |
| C7/6 |
81 x 162 mm |
| C7 |
81 x 114 mm |
| DL(E65) |
110 x 220 mm |


